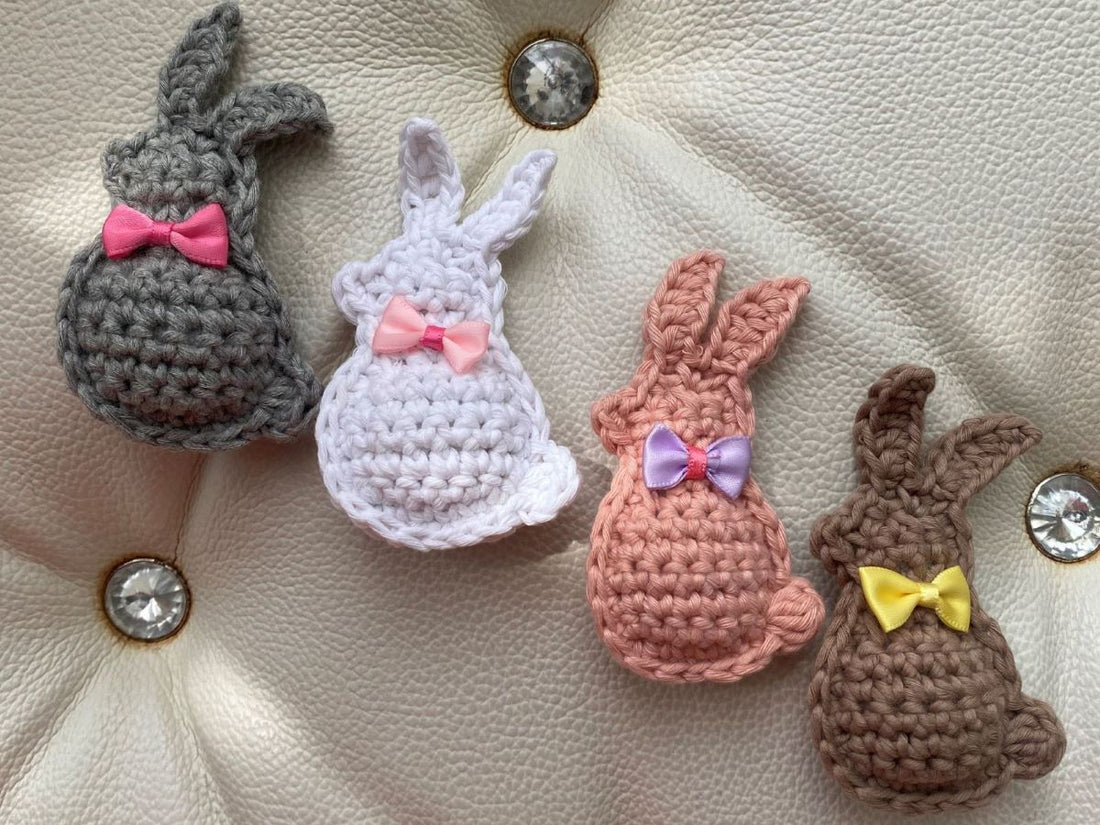
This is a pattern that I usually used to teach the basic of crocheting for first-time crocheter. It comprises of the basic stitches that is commonly used in other larger projects. The bunny silhouette amigurumi is easy and quick to complete, so it is pretty rewarding for beginner to see result of their crochet piece.
If you prefer the pdf version of the pattern, feel free to check out here with a small amount fee to support the designer.
Abbreviations:
- ch: chain(s)
- sc: single crochet
- inc: increase - make 2 single crochet in the same stitch
- sc2tog / dec: single crochet 2 stitches together / decrease
- hdc: half double crochet
- dc: double crochet
- st(s): stitch(es)
Special stitch:
4-dc-puff st: yarn over and pull out a loop from the next st, yarn over and pull out 2 loops, (yarn over and pull out a loop from the same st, yarn over and pull out 2 loops)*repeat 3 more times. Now you have 5 loops on your hook. Yarn over and pull out all loops from your hook and ch 1.
Materials and tools:
Let's get started with the material and tools.
- Worsted/DK weight yarn (cat3) in any color of your preference
- A small bow ribbon
- Polyester stuffing
- 3.5mm (Jap 6/0) crochet hook
- Tapestry needle
- Stitch markers (optional)
- Scissors
Center Piece (make 2 - start from the rear piece)
Ch 5.
Row 1: inc, sc 2, inc [6]
Row 2: ch 1, turn. inc, sc 4, inc [8]
Row 3 ~ 5: ch 1, turn. sc in each sts [8]
Row 6: ch 1, turn. sc2tog, sc 4, sc2tog [6]
Row 7: ch 1, turn. sc2tog, sc 2, sc2tog [4]
Row 8: ch 1, turn. sc2tog*2 times [2]
Row 9: ch 1, turn. inc*2 times [4]
Row 10: ch 1, turn. sc in each sts [4]
Row 11: ch 1, turn. sc 1, sc2tog, sc 1 [3]
Fasten off and cut yarn for the first piece, but do not cut yarn on the second piece.

With the 2 center piece stacked together, now crochet around the edge starting from the left side, then the bottom part, right side and finally the top part.

If you find it hard to follow the written instruction, you can also watch the video tutorial here:
Edging
Left side: sc 1, (ch 2, inc in the 2nd ch from hook), sc 8.
Continue to the bottom part: sc 4.
Continue to the right side: sc 1, (sl 1 in the next st, ch 2, 4-dc-puff st in the same st, ch 2, sl 1 in the same st), sc sc 8.
Insert stuffing while working on the right side edging.

Continue to top part: {sc 1, (ch 7, sc 1 in the 2nd ch from hook, hdc 1, dc 2, hdc 1, sc 1)}*repeat 2 times, sc 1.
Sl st to the 1st sc to fasten off.
Weave in yarn tails.
If you have a small ribbon bow, place it at the center of the neck to make it cuter. You can attach the small ribbon bow by using adhesives, or sew it in place.
Hope you enjoy the making of this simple bunny silhouette amigurumi.

